CrowdSec WAF QuickStart for Nginx / OpenResty
Protect an Nginx or OpenResty server with CrowdSec's AppSec (WAF) Component. After the prerequisites below, every step is a single copy-paste command. Most steps are the same for both engines — only step 3 differs, and the tabs there let you pick the right variant.
Prerequisites
Make sure the following are already done on the machine running your web server (all are single-page install guides):
- CrowdSec Security Engine installed and running — see the Linux quickstart.
- Nginx or OpenResty bouncer installed and registered against the CrowdSec LAPI:
- Nginx:
crowdsec-nginx-bouncer - OpenResty:
crowdsec-openresty-bouncer
- Nginx:
- Nginx or OpenResty is currently serving traffic on port 80 (used by the verification step at the end).
1. Install the AppSec rule collections
sudo cscli collections install \
    crowdsecurity/appsec-virtual-patching \
    crowdsecurity/appsec-generic-rules
This pulls the appsec-virtual-patching collection (rules for known CVEs, auto-updated daily) and the appsec-generic-rules collection (common attack patterns), plus the default AppSec configuration.
2. Turn on the AppSec Component
Create the acquisition file, then restart CrowdSec:
sudo mkdir -p /etc/crowdsec/acquis.d
sudo tee /etc/crowdsec/acquis.d/appsec.yaml > /dev/null <<'EOF'
appsec_configs:
  - crowdsecurity/appsec-default
labels:
  type: appsec
listen_addr: 127.0.0.1:7422
source: appsec
EOF
sudo systemctl restart crowdsec
Keep listen_addr on 127.0.0.1 — the AppSec Component must not be reachable from the internet. It should only be queried by your local web server / reverse proxy.
3. Point the bouncer at the AppSec Component
- Nginx
- OpenResty
sudo sed -i 's|^APPSEC_URL=.*|APPSEC_URL=http://127.0.0.1:7422|' \
    /etc/crowdsec/bouncers/crowdsec-nginx-bouncer.conf
sudo systemctl restart nginx
sudo sed -i 's|^APPSEC_URL=.*|APPSEC_URL=http://127.0.0.1:7422|' \
    /etc/crowdsec/bouncers/crowdsec-openresty-bouncer.conf
sudo systemctl restart openresty
The default bouncer config already contains an empty APPSEC_URL= line, so sed -i replaces it in place — the command is idempotent and safe to re-run.
4. Verify
Send a request that should trip an AppSec rule:
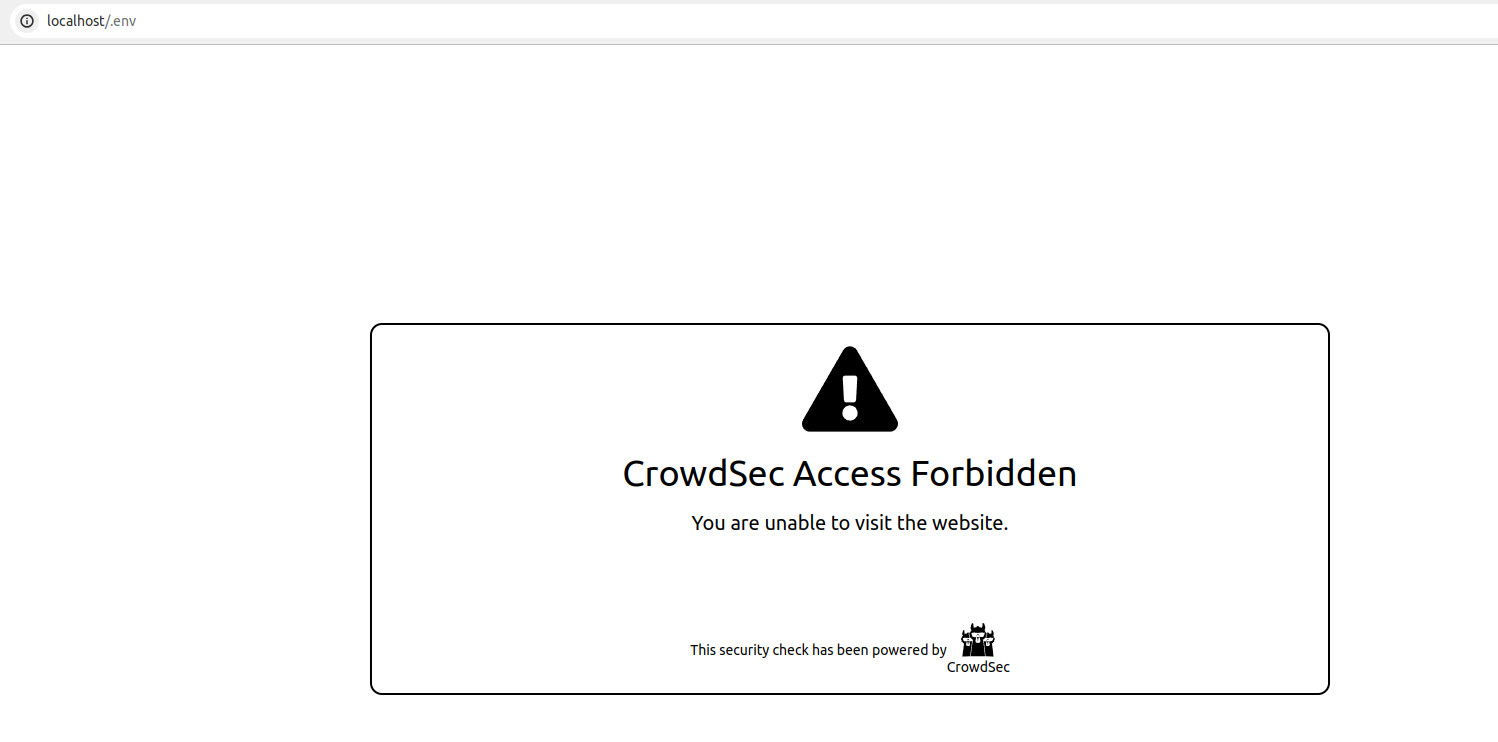
curl -I http://localhost/.env
You should get an HTTP/1.1 403 Forbidden response.
We're hitting a .env file, a common way to retrieve credentials left by mistake — the AppSec Component detects and blocks it.
Check that CrowdSec recorded the block:
sudo cscli metrics show appsec
Example metrics output
Appsec Metrics:
╭─────────────────┬───────────┬─────────╮
│ Appsec Engine │ Processed │ Blocked │
├─────────────────┼───────────┼─────────┤
│ 127.0.0.1:7422/ │ 2 │ 1 │
╰─────────────────┴───────────┴─────────╯
Appsec '127.0.0.1:7422/' Rules Metrics:
╭─────────────────────────────────┬───────────╮
│ Rule ID │ Triggered │
├─────────────────────────────────┼───────────┤
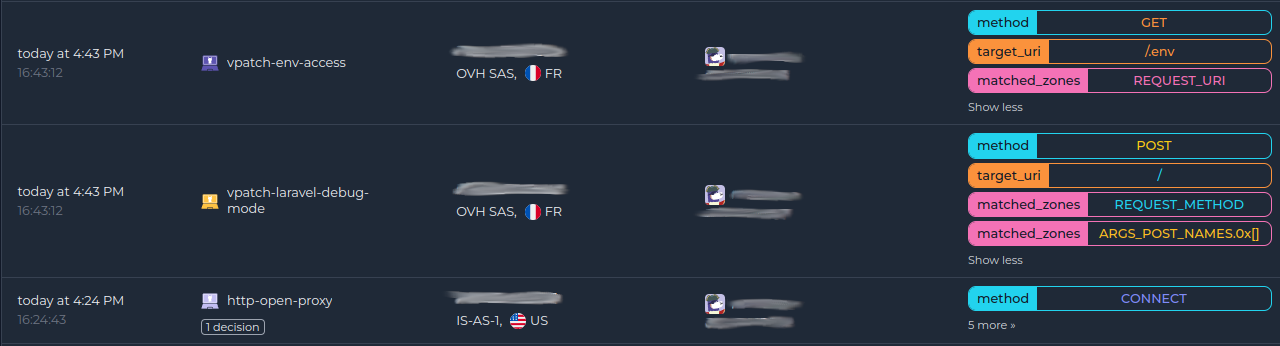
│ crowdsecurity/vpatch-env-access │ 1 │
╰─────────────────────────────────┴───────────╯
What just happened?
curlhit your web server at/.env.- The bouncer forwarded the request to the AppSec Component on
127.0.0.1:7422. - The request matched the
vpatch-env-accessrule. - The AppSec Component answered
403, the bouncer enforced it, and the web server returned the CrowdSec ban page.
If you'd rather see the block in a browser, visit http://<your-host>/.env — you'll get the CrowdSec ban page:
Monitor in the Console
If you haven't enrolled the Security Engine yet, follow how to enroll in the Console. Once enrolled, AppSec alerts show up alongside the rest of your alerts:
Next steps
- Monitor WAF alerts with
sudo cscli alerts listor in the CrowdSec Console. - Review the AppSec troubleshooting guide if you need to investigate or refine the deployment.
- Explore WAF deployment strategies, rules syntax, rule creation, and benchmarks to go further.