CrowdSec WAF QuickStart for Traefik
Objectives
The goal of this quickstart is to set up the AppSec Component to safeguard web applications running behind the Traefik reverse proxy. We'll deploy a set of rules designed to block well-known attacks and currently exploited vulnerabilities. Additionally, we'll show how to monitor these alerts through the Console.
Prerequisites
-
If you're new to the AppSec Component or Web Application Firewalls, start with the Introduction for a better understanding.
-
It's assumed that you have already installed:
- CrowdSec Security Engine: for installation, refer to the QuickStart guide. The AppSec Component, which analyzes HTTP requests, is enabled via the AppSec acquisition datasource.
- Traefik Plugin Remediation Component: Thanks to maxlerebourg and team, there is a Traefik Plugin that blocks requests directly in Traefik.
Before starting, ensure you are using the Traefik Plugin and NOT the older and deprecated traefik-crowdsec-bouncer as it hasn't received updates to use the new AppSec Component.
This guide will assume you already have a working Traefik setup using the Traefik Plugin. If you need help setting up Traefik, refer to the official documentation and the Traefik Plugin documentation.
If you already completed the General Setup (collections + acquisition), skip to Remediation Component Setup.
AppSec Component Setup
Collection installation
To begin setting up the AppSec Component, the initial step is to install a relevant set of rules.
We will utilize the crowdsecurity/appsec-virtual-patching collection, which offers a wide range of rules aimed at identifying and preventing the exploitation of known vulnerabilities.
This collection is regularly updated to include protection against newly discovered vulnerabilities. Upon installation, it receives automatic daily updates to ensure your protection is always current.
We also install the crowdsecurity/appsec-generic-rules collection. This collection contains detection scenarios for generic attack vectors. It provides some protection in cases where specific scenarios for vulnerabilities do not exist (yet).
You can always view the content of a collection on the hub
- Docker
- Docker Compose
- Kubernetes (Helm)
## This command should be used when you are persisting /etc/crowdsec/ on the host
docker exec -it crowdsec cscli collections install crowdsecurity/appsec-virtual-patching crowdsecurity/appsec-generic-rules
This command installs the needed AppSec Hub configuration items.
services:
  crowdsec:
    environment:
      - 'COLLECTIONS=crowdsecurity/appsec-virtual-patching crowdsecurity/appsec-generic-rules'
Please note the spaces between the collection names (hence why the quotes are needed).
This compose configuration file adds the required Hub configuration items.
Please add this in your values.yaml for your CrowdSec release.
appsec:
  env:
    - name: COLLECTIONS
      value: "[...] crowdsecurity/appsec-virtual-patching crowdsecurity/appsec-generic-rules [...]"
Please note the spaces between the collection names (hence why the double quotes are needed).
If your values.yaml does not already configure the CrowdSec agent (via agent.acquisition or agent.additionalAcquisition), you must explicitly disable it — otherwise the Helm chart will fail with No acquisition or additionalAcquisition configured:
agent:
  enabled: false
If you are running a full CrowdSec stack (agent + LAPI + AppSec), configure agent.acquisition with your actual log sources instead.
Now you can apply it with:
helm upgrade --install crowdsec crowdsec/crowdsec -n crowdsec --create-namespace -f ./crowdsec-values.yaml
This values.yaml modification adds the required Hub configuration items.
Those needed hub configuration items are:
- The AppSec Rules contain the definition of malicious requests to be matched and stopped.
- The AppSec Configuration links together a set of rules to provide a coherent set.
- The CrowdSec Parser and CrowdSec Scenario(s) are used to detect and remediate persistent attacks.
Once you have updated Compose or installed via the command line, restart the container. Before you do, set up the acquisition for the AppSec Component.
Setup the Acquisition
You now need to set up the acquisition for AppSec. The steps depend on how you run CrowdSec. For the complete acquisition reference, see the AppSec datasource.
- Docker
- Docker Compose
- Kubernetes (Helm)
In the directory where you persist configuration files, create an appsec.yaml file and mount it into the container.
Steps
- Change to the directory where you ran the
docker runordocker composecommand. - Create a file named
appsec.yamlin this directory. - Add the following content:
appsec_configs:
  - crowdsecurity/appsec-default
labels:
  type: appsec
listen_addr: 0.0.0.0:7422
source: appsec
Because CrowdSec runs inside a container, set listen_addr to 0.0.0.0 instead of 127.0.0.1 so it can accept connections from outside the container.
Edit your docker run command to mount the file:
If a crowdsec container is already running, stop/remove it before re-running with the updated mounts.
docker run -d --name crowdsec \
  -v /path/to/original:/etc/crowdsec \
  -v ./appsec.yaml:/etc/crowdsec/acquis.d/appsec.yaml \
  crowdsecurity/crowdsec
In the directory where you persist configuration files, create an appsec.yaml file and mount it into the container.
Steps
- Change to the directory where you ran the docker compose (or docker run) command.
- Create a file named appsec.yaml in this directory.
- Add the following content to the
appsec.yaml:
appsec_configs:
  - crowdsecurity/appsec-default
labels:
  type: appsec
listen_addr: 0.0.0.0:7422
source: appsec
Because CrowdSec runs in a container, set listen_addr to 0.0.0.0 (not 127.0.0.1) so it listens on the container’s network interface.
Mount the file in your Compose service:
services:
  crowdsec:
    volumes:
      - /path/to/original:/etc/crowdsec   # or a named volume
      - ./appsec.yaml:/etc/crowdsec/acquis.d/appsec.yaml
Once you have updated the compose file to include the volume mount and the updated environment variable, you can restart the container.
docker compose down crowdsec
docker compose rm crowdsec
docker compose up -d crowdsec
The previous compose commands presume the container is named crowdsec. If you have named the container something else, you will need to replace crowdsec with the name of your container.
With Kubernetes the acquisition setup is done via values.yaml.
Add the following to your CrowdSec values.yaml:
agent:
  enabled: false   # required if you have no agent.acquisition configured; replace with your log sources for a full stack
appsec:
  acquisitions:
    - appsec_configs:
        - crowdsecurity/appsec-default
      labels:
        type: appsec
      listen_addr: 0.0.0.0:7422
      path: /
      source: appsec
  enabled: true
Then apply with:
helm upgrade --install crowdsec crowdsec/crowdsec -n crowdsec --create-namespace -f ./crowdsec-values.yaml
Remediation Component Setup
As stated previously this guide already presumes you have the Traefik Plugin installed. If you do not have the Traefik Plugin installed, please refer to the official documentation for installation instructions.
Configuration
Depending on how you configured the Traefik Plugin, you will need to update the configuration to include the AppSec configuration.
Currently AppSec does not support mTLS authentication for the AppSec Component. If you have mTLS enabled, and wish to use the AppSec Component, you can define seperate middlewares for the AppSec Component.
- Traefik dynamic configuration
- Traefik middleware (Kubernetes)
If you have defined a dynamic configuration file for Traefik, you can add the following configuration to the file.
# Dynamic configuration
http:
  routers:
    my-router:
      rule: host(`whoami.localhost`)
      service: service-foo
      entryPoints:
        - web
      middlewares:
        - crowdsec

  services:
    service-foo:
      loadBalancer:
        servers:
          - url: http://127.0.0.1:5000

  middlewares:
    crowdsec:
      plugin:
        bouncer:
          enabled: true
          crowdsecAppsecEnabled: true
          crowdsecAppsecHost: crowdsec:7422
          crowdsecAppsecFailureBlock: true
          crowdsecAppsecUnreachableBlock: true
          crowdsecLapiKey: <your-shared-traefik-bouncer-key>
Instead if you define the configuration using labels on the containers you can add the following labels to the Traefik Plugin container.
  labels:
      - "traefik.http.middlewares.crowdsec-bar.plugin.bouncer.enabled=true"
      - "traefik.http.middlewares.crowdsec-bar.plugin.bouncer.crowdsecAppsecEnabled=true"
      - "traefik.http.middlewares.crowdsec-bar.plugin.bouncer.crowdsecAppsecHost=crowdsec:7422"
      - "traefik.http.middlewares.crowdsec-bar.plugin.bouncer.crowdsecLapiKey=<your-shared-traefik-bouncer-key>"
For Kubernetes, use the same secret management pattern as in the Traefik bouncer setup: store the shared bouncer key in Kubernetes secrets and reference it from both CrowdSec and Traefik.
Two secrets are needed because CrowdSec and Traefik run in different namespaces:
- In the
crowdsecnamespace, CrowdSec LAPI readsBOUNCER_KEY_traefikfrom thecrowdsec-keyssecret. - In the
traefiknamespace, Traefik mounts the same key from thecrowdsec-bouncer-keysecret as a file.
Both secrets must contain the same BOUNCER_KEY_traefik value. If you already
created them for the base bouncer setup, you can reuse them here.
If you haven't created the bouncer key yet, generate one with:
kubectl exec -n crowdsec deploy/crowdsec-lapi -c crowdsec-lapi -- cscli bouncers add traefik -o raw
Copy the printed key — you will use it as <your-shared-traefik-bouncer-key> below.
Create or update the secrets:
apiVersion: v1
kind: Secret
metadata:
  name: crowdsec-keys
  namespace: crowdsec
type: Opaque
stringData:
  ENROLL_KEY: "<your-existing-enroll-key>"
  BOUNCER_KEY_traefik: "<your-shared-traefik-bouncer-key>"
---
apiVersion: v1
kind: Secret
metadata:
  name: crowdsec-bouncer-key
  namespace: traefik
type: Opaque
stringData:
  BOUNCER_KEY_traefik: "<your-shared-traefik-bouncer-key>"
Apply it:
kubectl apply -f crowdsec-keys.yaml
Then make sure the CrowdSec Helm values reference BOUNCER_KEY_traefik from
the crowdsec-keys secret:
lapi:
  env:
    - name: BOUNCER_KEY_traefik
      valueFrom:
        secretKeyRef:
          name: crowdsec-keys
          key: BOUNCER_KEY_traefik
Apply the CrowdSec release again:
helm upgrade --install crowdsec crowdsec/crowdsec --namespace crowdsec --create-namespace -f crowdsec-values.yaml
Then configure Traefik to mount the crowdsec-bouncer-key secret and
reference it with crowdsecLapiKeyFile.
Use a Traefik values file like this:
experimental:
  plugins:
    bouncer:
      moduleName: github.com/maxlerebourg/crowdsec-bouncer-traefik-plugin
      version: v1.4.5
volumes:
  - name: crowdsec-bouncer-key
    mountPath: /etc/traefik/crowdsec
    type: secret
    secretName: crowdsec-bouncer-key
The Traefik Helm chart uses a read-only root filesystem by default. The plugin loader needs a writable directory to cache downloaded plugins. Add an emptyDir volume for /plugins-storage alongside the secret volume above:
deployment:
  additionalVolumes:
    - name: plugins-storage
      emptyDir: {}
additionalVolumeMounts:
  - name: plugins-storage
    mountPath: /plugins-storage
Without this, Traefik will fail to start with unable to create directory /plugins-storage/sources: read-only file system.
Then create a Traefik Middleware resource:
kubectl apply -f traefik-middleware.yaml
The spec.plugin.<key> in the Middleware must match the key you registered under experimental.plugins.<key> in Traefik's configuration — not the module name (crowdsec-bouncer-traefik-plugin). Since the traefik-values.yaml above registers the plugin under the key bouncer, use bouncer: here.
apiVersion: traefik.io/v1alpha1
kind: Middleware
metadata:
  name: crowdsec
  namespace: traefik
spec:
  plugin:
    bouncer:
      enabled: true
      crowdsecMode: stream
      crowdsecLapiScheme: http
      crowdsecLapiHost: crowdsec-service.crowdsec.svc.cluster.local:8080
      crowdsecLapiKeyFile: /etc/traefik/crowdsec/BOUNCER_KEY_traefik
      httpTimeoutSeconds: 60
      forwardedheaderstrustedips:
        - 10.0.0.0/8
        - 192.168.0.0/16
        - 203.0.113.0/24
        - 2001:db8::/32
      crowdsecAppsecEnabled: true
      crowdsecAppsecHost: crowdsec-appsec-service.crowdsec.svc.cluster.local:7422
      crowdsecAppsecFailureBlock: true
      crowdsecAppsecUnreachableBlock: true
How is the AppSec hostname derived?
The Helm chart creates a Service named <release>-appsec-service in the namespace where CrowdSec is installed. With the default release name crowdsec in namespace crowdsec, the in-cluster DNS name is:
crowdsec-appsec-service.crowdsec.svc.cluster.local:7422
If you used a different release name or namespace, adjust accordingly: <release>-appsec-service.<namespace>.svc.cluster.local:7422.
Less secure alternative: define the Traefik bouncer key inline with crowdsecLapiKey instead of mounting crowdsecLapiKeyFile
apiVersion: traefik.io/v1alpha1
kind: Middleware
metadata:
  name: crowdsec
  namespace: traefik
spec:
  plugin:
    bouncer:
      enabled: true
      crowdsecMode: stream
      crowdsecLapiScheme: http
      crowdsecLapiHost: crowdsec-service.crowdsec.svc.cluster.local:8080
      crowdsecLapiKey: <your-shared-traefik-bouncer-key>
      httpTimeoutSeconds: 60
      forwardedheaderstrustedips:
        - 10.0.0.0/8
        - 192.168.0.0/16
        - 203.0.113.0/24
        - 2001:db8::/32
      crowdsecAppsecEnabled: true
      crowdsecAppsecHost: crowdsec-appsec-service.crowdsec.svc.cluster.local:7422
      crowdsecAppsecFailureBlock: true
      crowdsecAppsecUnreachableBlock: true
If your IngressRoute lives in a different namespace than the Middleware (e.g. default vs traefik), Traefik's Kubernetes CRD provider blocks cross-namespace references by default. Either place the Middleware in the same namespace as the IngressRoute, or add the following to your Traefik Helm values:
providers:
  kubernetesCRD:
    allowCrossNamespace: true
You can still add some route configuration through IngressRoute and attach the middleware to those routes.
For more comprehensive documentation on the Traefik Plugin configuration, please refer to the official documentation.
We can't cover all the possible configurations for Traefik in this guide, so please refer to the official documentation for more information.
Directives
The following directives are available for the Traefik Plugin:
crowdsecAppsecEnabled
bool
Enable or disable the AppSec Component.
crowdsecAppsecHost
string
The host and port where the AppSec Component is running.
crowdsecAppsecFailureBlock
bool
If the AppSec Component returns 500 status code should the request be blocked.
crowdsecAppsecUnreachableBlock
bool
If the AppSec Component is unreachable should the request be blocked.
Testing the AppSec Component + Remediation Component
For bare-metal/Docker, the web server is assumed to be listening on port 80 on the same host — adjust the URL if needed. For Kubernetes, send the test request through your Ingress (e.g. http://<node-ip>/<path>) rather than directly to the AppSec port.
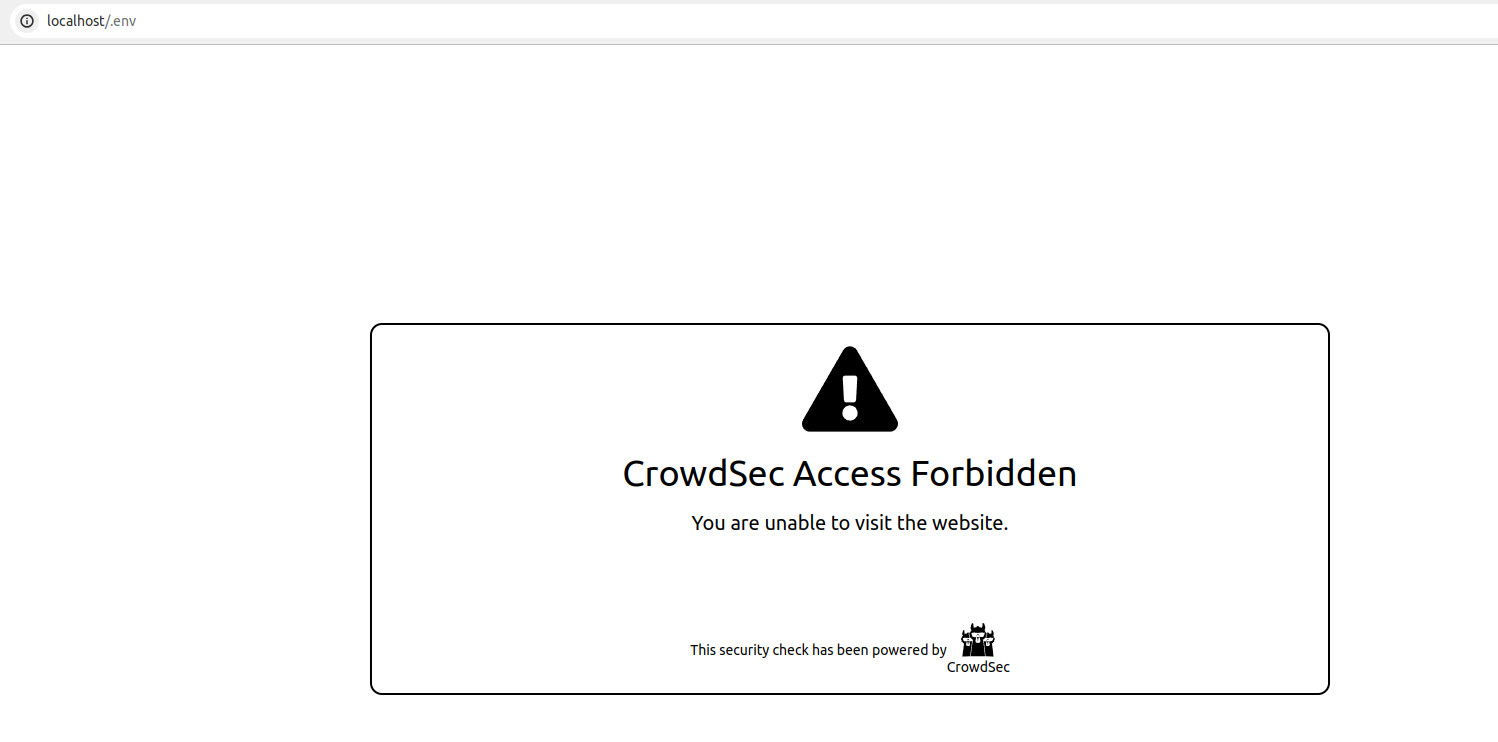
If you try to access http://localhost/.env from a browser, your request will be blocked, resulting in the display of the following HTML page:
We can also look at the metrics from cscli metrics show appsec — it will display:
- the number of requests processed by the AppSec Component
- Individual rule matches
The command to run depends on your environment:
sudo cscli metrics show appsec
kubectl exec -n crowdsec \
  $(kubectl get pod -n crowdsec -l type=appsec -o name | head -1) \
  -c crowdsec-appsec -- cscli metrics show appsec
Example Output
Appsec Metrics:
╭─────────────────┬───────────┬─────────╮
│  Appsec Engine  │ Processed │ Blocked │
├─────────────────┼───────────┼─────────┤
│ 127.0.0.1:7422/ │ 2         │ 1       │
╰─────────────────┴───────────┴─────────╯

Appsec '127.0.0.1:7422/' Rules Metrics:
╭─────────────────────────────────┬───────────╮
│             Rule ID             │ Triggered │
├─────────────────────────────────┼───────────┤
│ crowdsecurity/vpatch-env-access │ 1         │
╰─────────────────────────────────┴───────────╯
Appsec Metrics:
╭─────────────────┬───────────┬─────────╮
│  Appsec Engine  │ Processed │ Blocked │
├─────────────────┼───────────┼─────────┤
│ 0.0.0.0:7422/   │ 2         │ 1       │
╰─────────────────┴───────────┴─────────╯

Appsec '0.0.0.0:7422/' Rules Metrics:
╭─────────────────────────────────┬───────────╮
│             Rule ID             │ Triggered │
├─────────────────────────────────┼───────────┤
│ crowdsecurity/vpatch-env-access │ 1         │
╰─────────────────────────────────┴───────────╯
You can test and investigate further with Stack Health-Check and Appsec Troubleshooting guide
Explanation
What happened in the test that we just did is:
- We did a request (
localhost/.env) to our local webserver - Thanks to the Remediation Component configuration, forwarded the request to
http://127.0.0.1:7422 - Our AppSec Component, listening on
http://127.0.0.1:7422analyzed the request - The request matches the AppSec rule to detect .env access
- The AppSec Component thus answered with HTTP 403 to the Remediation Component, indicating that the request must be blocked
- The web server then presented us with the default "request blocked" page.
Integration with the Console
If you haven't yet, follow the guide about how to enroll your Security Engine in the Console.
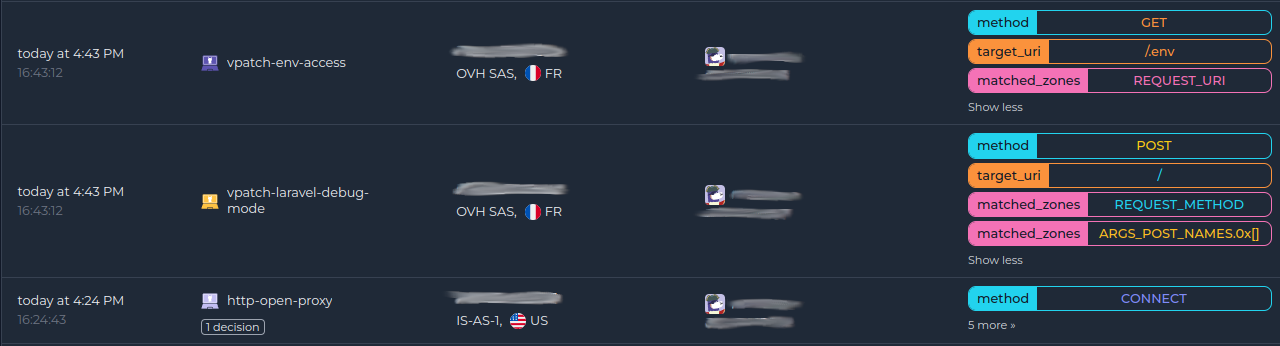
Once done, all your alerts, including the ones generated by the AppSec Component, appear in the Console:
Next steps
You are now running the AppSec Component on your CrowdSec Security Engine.
As the next steps, you can:
- Monitor WAF alerts in the CrowdSec Console.
- Review the AppSec troubleshooting guide if you need to investigate or refine the deployment.
- Explore WAF deployment strategies, rules syntax, rule creation, and benchmarks to go further.