WHM plugin
The WHM plugin lets you control and monitor the CrowdSec Security Engine directly from your WHM dashboard.
It includes WHM-ready defaults to help you secure your server quickly.
This guide walks you through installation and the post-install checks.
Installation
Prerequisites: install CrowdSec
To use this plugin, first install the CrowdSec Security Engine on your WHM server.
Download the plugin
First, connect to your WHM server via SSH.
Go to your home directory or any directory that can be used to download the sources.
cd ~
OR
cd /tmp
Choose the release X.Y.Z you want to install, then:
- Download the source code archive.
wget https://github.com/crowdsecurity/cs-whm-plugin/archive/refs/tags/vX.Y.Z.tar.gz
- Extract sources:
tar -xvf vX.Y.Z.tar.gz
- Go to the extracted folder:
cd cs-whm-plugin-*/plugin
Install the plugin
Once you have the sources, install the plugin by running the install script as root:
sudo sh crowdsec.sh install
You should see:
Installing CrowdSec plugin...
crowdsec registered
If CrowdSec is already installed, the script will also use cscli to install the WHM collection, create acquisition files, and restart the CrowdSec service.
If you don't want the script to install the WHM collection, you can use the --only-plugin option:
sudo sh crowdsec.sh install --only-plugin
Navigate to the plugin in WHM
CrowdSec should appear in the sidebar under Plugins.
You can filter the sidebar by typing crowdsec.
Post-installation checks
After installation, run the checks below to make sure everything works as expected.
Check the CrowdSec service status
At the top of each CrowdSec plugin page, you can see the service status. A green tick means the service is running.
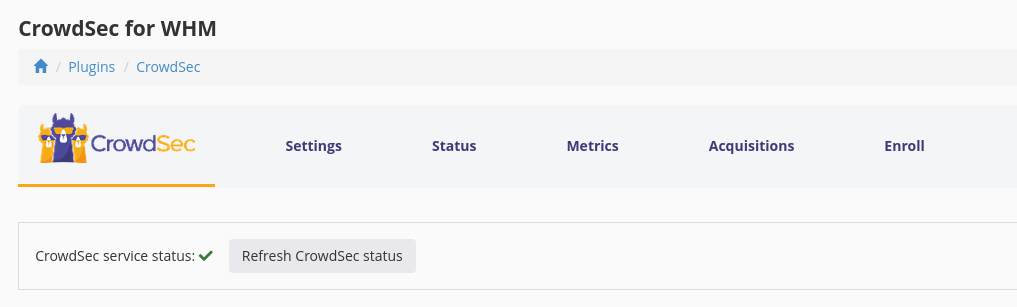
If not, check the troubleshooting section.
Check the metrics
Browse to the metrics tab and ensure the CrowdSec Security Engine is reporting data.
If not, check the troubleshooting section.
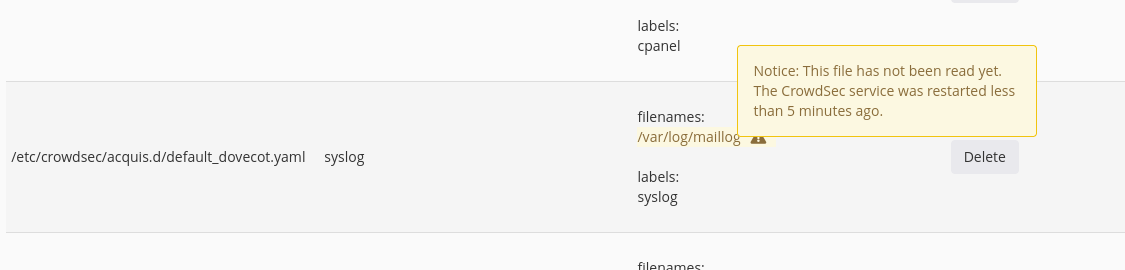
Check the default acquisition files
The plugin comes with a set of default acquisition configuration files tailored for WHM typical logs directories.
Those files are created in /etc/crowdsec/acquis.d/, and each file defines logs for a service you want to protect.
Note that the main acquisition file is /etc/crowdsec/acquis.yaml, but all additional acquisitions should be placed in /etc/crowdsec/acquis.d.
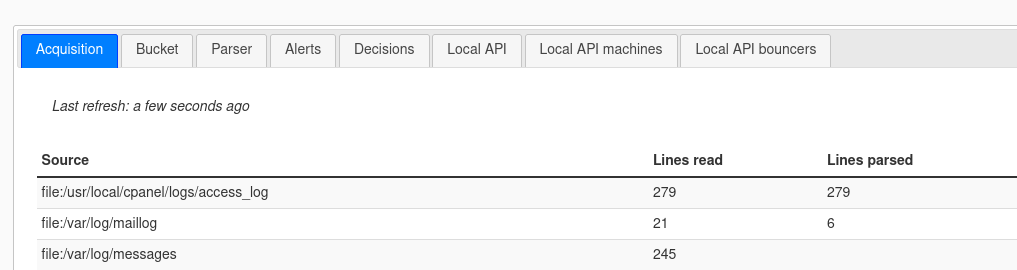
The acquisition tab lists each acquisition config and a summary of its contents. This section is more advanced; if you installed WHM with the defaults, the default acquisitions should be sufficient.
What is being parsed can be seen in the metrics tab of the plugin.
The main thing to confirm is that your web server logs are being parsed. For default setups, that usually means Apache logs are read correctly.
Some acquisitions may show a warning (⚠) next to log filenames, indicating nothing was parsed since the last CrowdSec restart.
Depending on server activity this can be normal; check the parsed lines in metrics > acquisition.
Usually, you should see activity within a few minutes.
Enroll your engine in CrowdSec's Console
The CrowdSec Console provides deeper insights across your Security Engines. It also lets you add features such as extra blocklists, which can help block botnets or Tor nodes.
The Console is available at app.crowdsec.net.
You can enroll your engine by going to the Enroll tab.
Fill in your enrollment key and click the Enroll button.
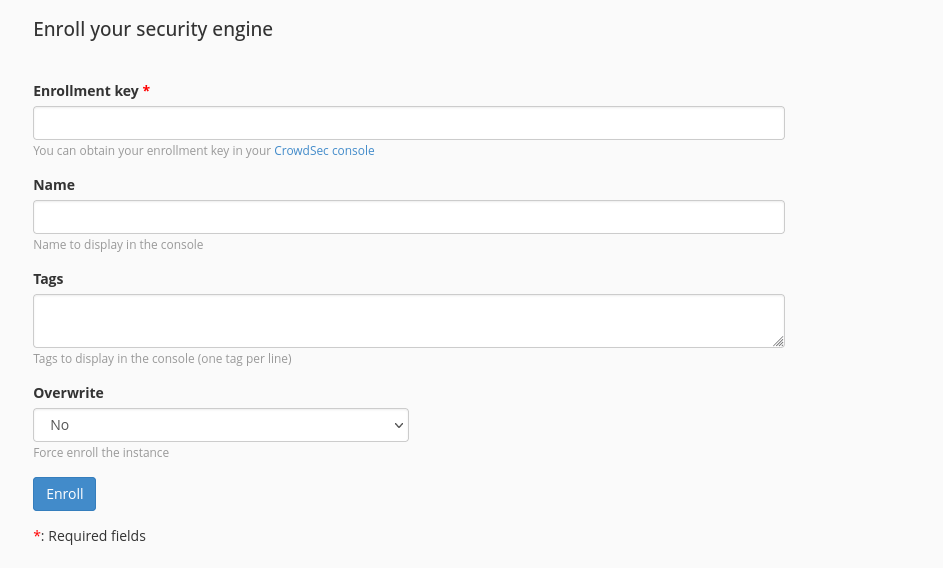
You'll see a confirmation in the Console. Once accepted, your instance appears in the list. You can restart CrowdSec to refresh metadata and see attached bouncers immediately. If you do not restart, the Console updates within 15 to 30 minutes.
Explore the Console features in the Console section.
Troubleshoot
CrowdSec is not running
Most of the time this is a port conflict or a config file error.
- Check and change the ports In the settings menu.
- Check the logs for errors
- CrowdSec logs:
sudo less /var/log/crowdsec.log(can be verbose). - Service logs:
sudo journalctl -u crowdsec
- CrowdSec logs:
- Ultimately, you can check the Security Engine Troubleshooting section
Changing port configuration
The CrowdSec Local API uses port 8080 by default, and the metrics service (Prometheus) uses 6060.
It might be conflicting with another service installed on your server.
You may have a conflict on either the Local API port or the metrics port.
Easily change them and restart the service from the Settings menu of the plugin.

Next steps
Great, you now have CrowdSec installed on your system. Within the post installation steps you will find the next steps to configure and optimize your installation.